- Published on
How to use React Props for Power Platform Code Apps #4
- Authors

- Name
- Calum Harrison

Treat props pass parameters to components to make them more dynamic.
We will take a look at a simple example of using the header and passing brand name etc.
Before the header component looks like this but I want to make the brand name and theme dynamic.
import Container from 'react-bootstrap/Container';
import Nav from 'react-bootstrap/Nav';
import Navbar from 'react-bootstrap/Navbar';
import { LinkContainer } from "react-router-bootstrap";

function Header() {
  return (
    <Navbar expand="lg" className="bg-body-tertiary" data-bs-theme="light">
      <Container>
            <LinkContainer to="/">
            <Navbar.Brand>BookEasy</Navbar.Brand>
            </LinkContainer>

        <Navbar.Toggle aria-controls="basic-navbar-nav" />
        <Navbar.Collapse id="basic-navbar-nav">
          <Nav className="me-auto">
            <LinkContainer to="/">
            <Nav.Link>Home</Nav.Link>
            </LinkContainer>
            <LinkContainer to="/book">
            <Nav.Link>Book</Nav.Link>
            </LinkContainer>
            <LinkContainer to="/my-bookings">
            <Nav.Link>Confirm Booking</Nav.Link>
            </LinkContainer>
     </Nav>
        </Navbar.Collapse>
      </Container>
    </Navbar>
  );
}

export default Header;
Child component
First in Typescript you have to declare a interface for the props.
type HeaderProps = {
  brandName: string
  theme: 'light' | 'dark'
}
Then inside the method declaration we have to pass the props and link this to the above interface.
function Header({ brandName, theme }: HeaderProps) {
  return (
    <Navbar expand="lg" className="bg-body-tertiary" data-bs-theme={theme}>
      <Container>
            <LinkContainer to="/">
            <Navbar.Brand>{brandName}</Navbar.Brand>
            </LinkContainer>

        <Navbar.Toggle aria-controls="basic-navbar-nav" />
        <Navbar.Collapse id="basic-navbar-nav">
          <Nav className="me-auto">
            <LinkContainer to="/">
            <Nav.Link>Home</Nav.Link>
            </LinkContainer>
            <LinkContainer to="/book">
            <Nav.Link>Book</Nav.Link>
            </LinkContainer>
            <LinkContainer to="/my-bookings">
            <Nav.Link>Confirm Booking</Nav.Link>
            </LinkContainer>
     </Nav>
        </Navbar.Collapse>
      </Container>
    </Navbar>
  );
}

export default Header;
Then with curly braces we can assign the prop value (line 3 & 6).
Parent Component
In order for the header to be processed we need to pass the prop values to the component.
To do this, within the component declaration of the header, we assign the prop values.
import Container from 'react-bootstrap/Container';
import Header from "./Header";

type LayoutProps = {
    children: React.ReactNode;
};

function Layout({ children }: LayoutProps) {
    return (
        <>
            <Header
                brandName="BookEasy"
                theme="light"
            />
            <Container>
                {children}
            </Container>
            {/* TODO: Add footer for later... */}
        </>
    );
}

export default Layout;
What’s really cool about using TS is the type validation for props. For instance, if you assigned the theme prop to be “blue“ it would an error as its not either “light“ or “dark“.
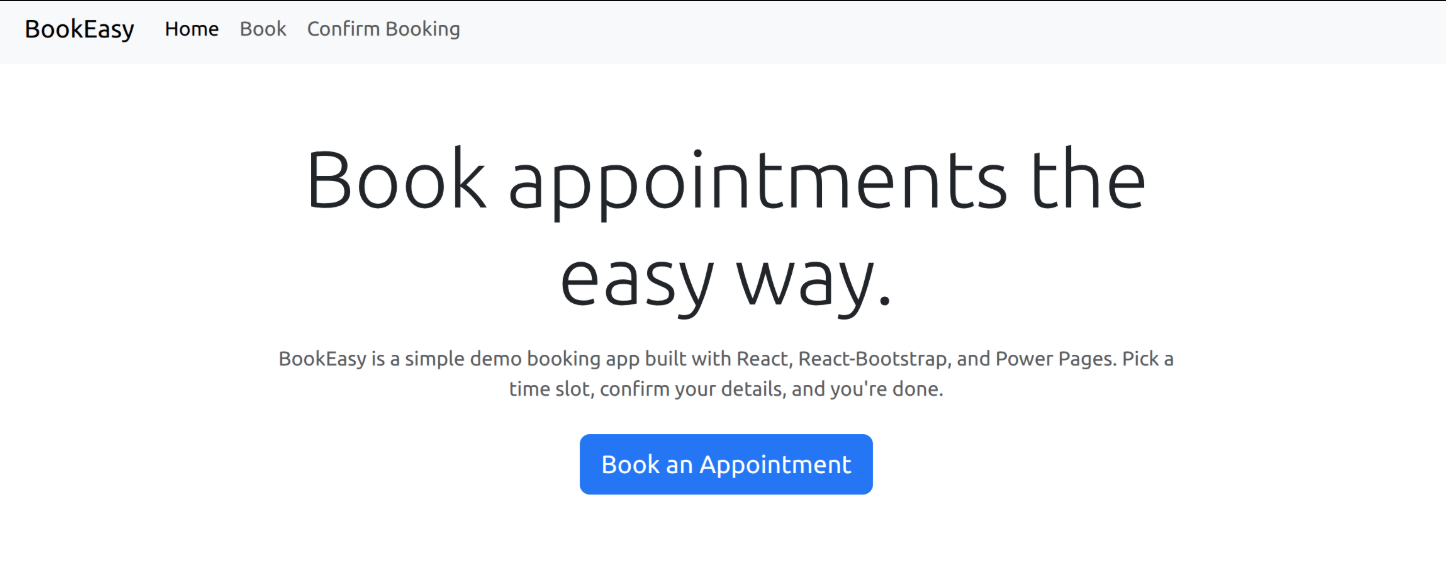
Here’s what the home page looks like with the custom props added to the header.
This is a personal, non-work project just for learning and sharing.