- Published on
How to use React Router with Power Pages #2
- Authors

- Name
- Calum Harrison
In this series I’m trying to build a portal with React and Power Pages and documenting tips along the way.
I’m not by any means a expert in React or Typescript but I do have some past experience with these tools so I’m learning along the way too :)
In order to navigate between pages in React SPA site Routing needs to be in place.
At the time this post was written December 2025, there was a critical vulnerability with Routing with Next JS. Please review if you have used this tech stack.
Routing introduction
There are 4 key components for Routing.
BrowserRouter: Wraps your app and uses the browser’s history API to keep the UI in sync with the URL.
Routes: A container that looks at the current URL and decides which route should render.
Route: Defines a mapping between a URL path and the component that should render for it.
Link: Renders a navigation element that changes the URL without reloading the page.
Routing example
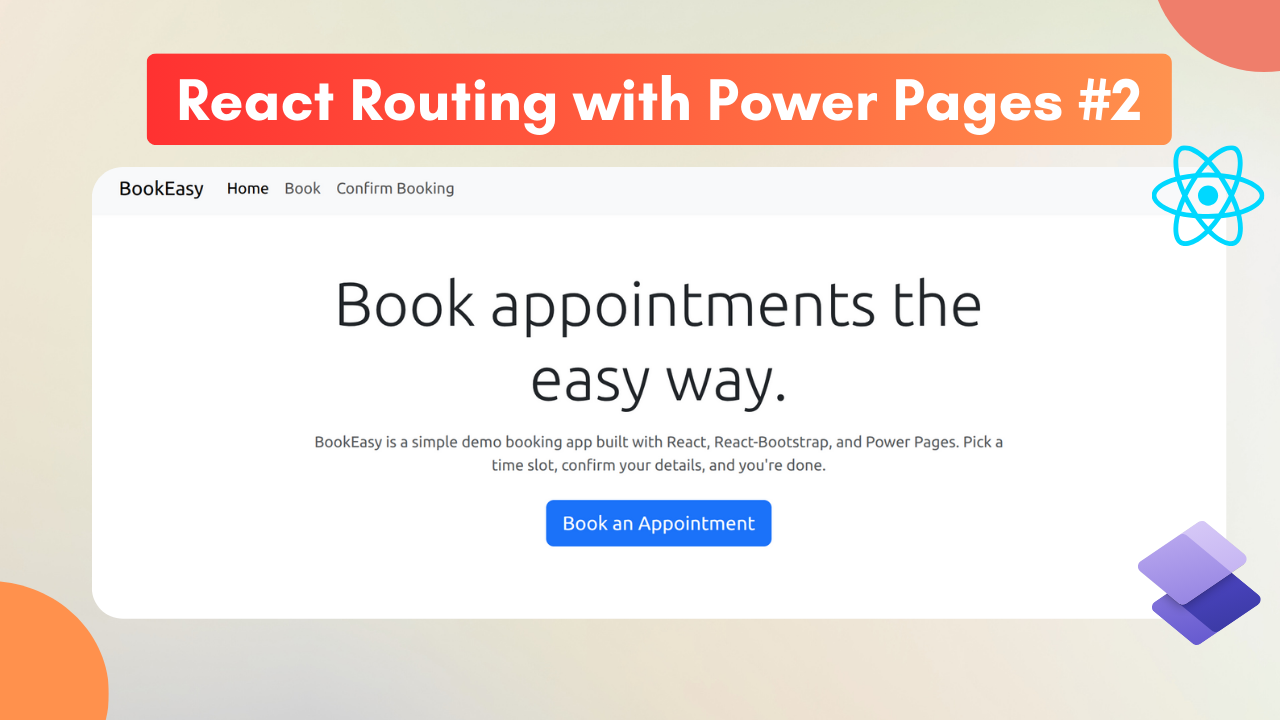
In this example we will be following a simple structure of a booking application. There will be these pages.
- Home
- Book
- Confirm booking
- My bookings
First thing to do is to install the npm module.
npm install react-router-dom
Then import the browser import component around the main render file. I’ve placed this in main to separate it out but you can include it in the app file too.
import { StrictMode } from 'react'
import { createRoot } from 'react-dom/client'
import './index.css'
import 'bootstrap/dist/css/bootstrap.min.css';
import App from './App.tsx'
import { BrowserRouter } from 'react-router-dom'

createRoot(document.getElementById('root')!).render(
  <StrictMode>
    <BrowserRouter>
    <App />
    </BrowserRouter>
  </StrictMode>
)
Then its time to add Routes components.
First we establish the Routes component and within that the routes to the navigation page. This tells this file to say if we get a request to this path go to this component/page.
import React from 'react'
import Home from './pages/Home'
import Book from './pages/bookings/Book'
import ConfirmBooking from './pages/bookings/ConfirmBooking'
import MyBookings from './pages/bookings/MyBookings'
import { Routes, Route } from "react-router-dom"
import Layout from './components/layout/Layout'


function App() {

  return (
    <>
      <Layout>

        {/* Navigation */}
        <Routes>
          <Route path="/" element={<Home />} />
          <Route path="/book" element={<Book />} />
          <Route path="/confirm-booking" element={<ConfirmBooking />} />
          <Route path="/my-bookings" element={<MyBookings />} />
        </Routes>

      </Layout>

    </>

  )
}

export default App
To trigger the routing we need to provide a link. In the example, below on the home page there is a button and when pressed it redirects to the booking page.
As I’m using Bootstrap the Link container component has been used. With this npm module react-router-bootstrap
import { Row, Col, Button } from "react-bootstrap";
import { LinkContainer } from "react-router-bootstrap";
function Home() {
return (
<Row className="align-items-center" style={{ minHeight: "60vh" }}>
<Col md={{span: 8, offset: 2 }} lg={{span: 8, offset: 2 }} xl={{span: 8, offset: 2 }} className="text-center">
<h1 className="mb-3 display-3">Book appointments the easy way.</h1>
<p className="mb-4 text-muted">
BookEasy is a simple demo booking app built with React, React-Bootstrap,
and Power Pages. Pick a time slot, confirm your details, and you're done.
</p>
<LinkContainer to="/book">
<Button variant="primary" size="lg">Book an Appointment
</Button>
</LinkContainer>
</Col>
</Row>
);
}
export default Home;
What’s next
I will likely cover how to use Bootstrap with React JS.
As always, thanks for reading and happy Christmas for 2025!
This is a personal, non-work project just for learning and sharing.